1. 백엔드 세팅
npm init -y명령어를 실행하면 package.json이 생성된다.
scripts, main은 삭제해주고, 기타 필요한 부분만 작성해준다.
{
  "name": "zoom",
  "version": "1.0.0",
  "description": "Zoom Clone using WebRTC and WebSockets",
  "license": "MIT"
}
nodemon 설치
npm i nodemon -D* babel.config.json 파일 생성
* nodemon.json 파일 생성
* src 폴더 생성
ㄴ server.js 생성
바벨설치
npm i @babel/core @babel/cli @babel/node @babel/preset-env -D.gitignore에 /node_modules 추가
nodemon.json
{
  "exec": "babel-node src/server.js"
}
"exec" 명령어를 사용해서 server.js를 실행해라 => nodemon.json은 이 역할만 수행한다.
src/server.js에 대해 babel-node 명령문을 실행시키는 것이다.
여기서 git init을 해줘도 되는데, 나는 이미 터미널에서 폴더를 생성하고 작업한 터라
폴더 생성 후
git remote add origin "ssh 주소"위의 명령어를 통해 리모트와 연결해서 사용했다.
(참고 : master 에서 main으로 바꾸는 방법 "git branch -M main" 명령어 입력 후 최초 1회 -force push 실행)
babel.config.json
{
  "presets": ["@babel/preset-env"]
}
package.json
  "scripts":{
    "dev": "nodemon"
  },
nodemon이 호출되면 nodemon.json에 있는 코드를 실행할 것
이제 express, pug를 설치하자
npm i express
npm i pug
/src/server.js에서
import express from "express";

const app = express();
app.listen(3000);
express를 실행해서 3000포트를 열어줌
npm run dev실행 시
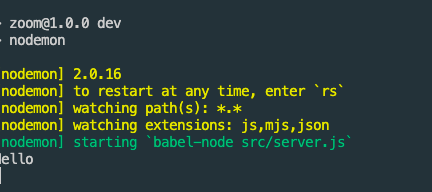
잘 실행되는 것을 알 수 있다!
프론트 세팅은 다음편에..
'Frontend > Javascript' 카테고리의 다른 글
| WebRTC - 실시간 채팅 APP 만들기 (5) (0) | 2023.04.13 |
|---|---|
| WebRTC - 실시간 채팅 APP 만들기 (4) (0) | 2023.04.13 |
| WebRTC - 실시간 채팅 APP 만들기 (3) (0) | 2023.04.13 |
| WebRTC - 실시간 채팅 APP 만들기 (2) (0) | 2023.04.13 |
| Array method (0) | 2023.01.09 |